36lb injector install for 2000 v6 Camaro

Advance questions and tips about cars.

Moderator: Guardians Knights

36lb injector install for 2000 v6 Camaro

Postby Guardian » Mon Jul 13, 2009 12:21 am

Read next post for information and pics on install


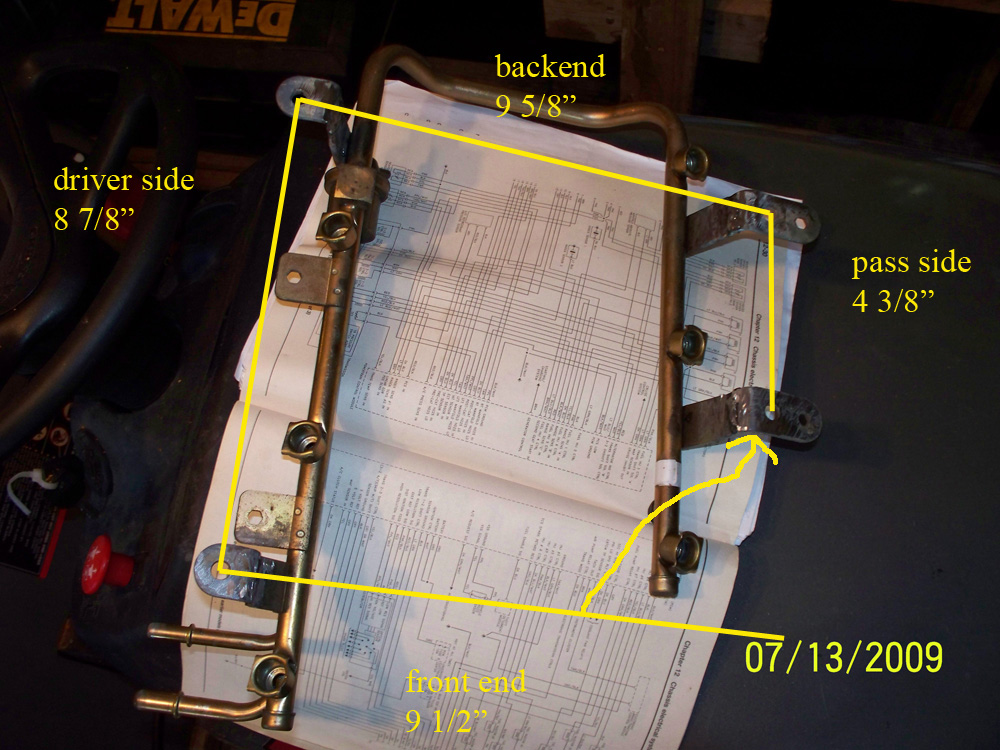
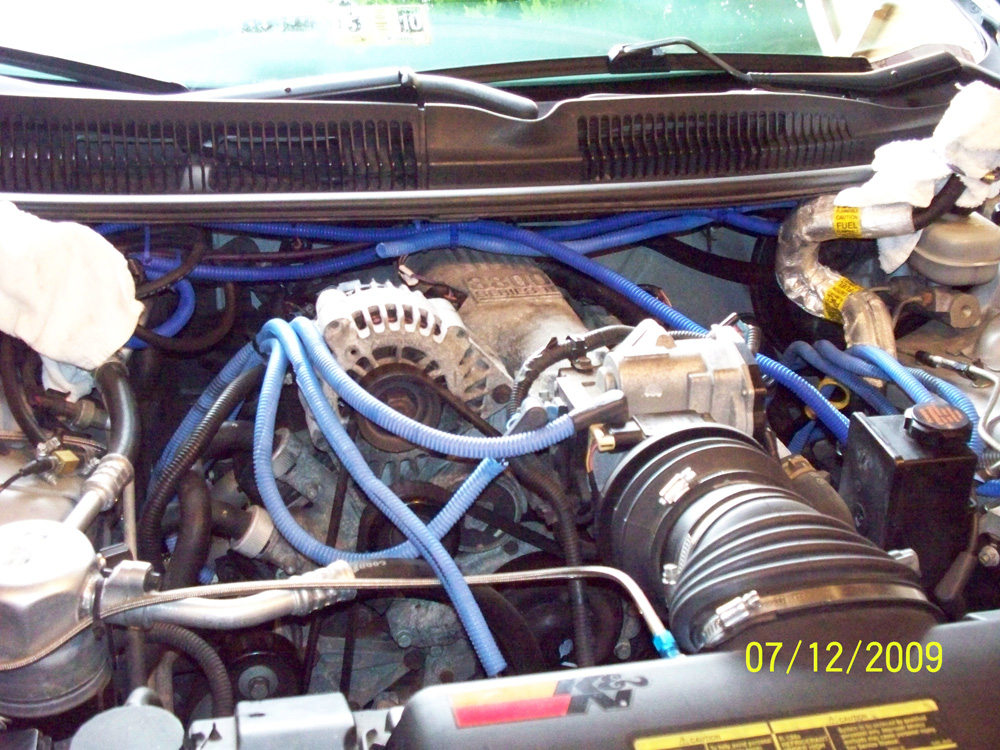
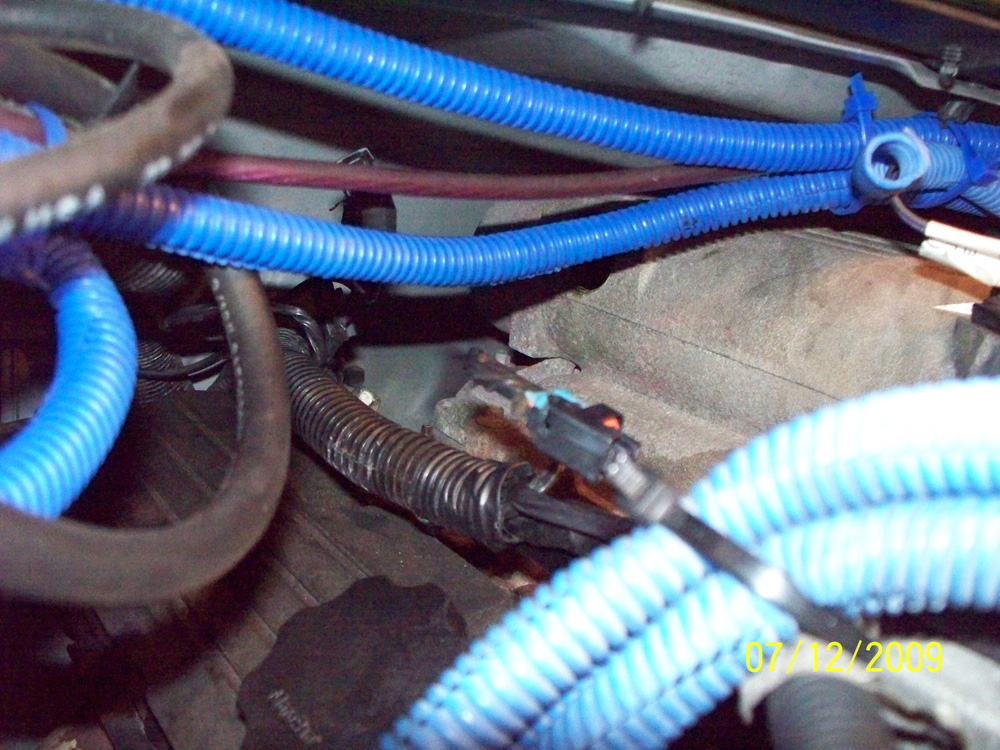
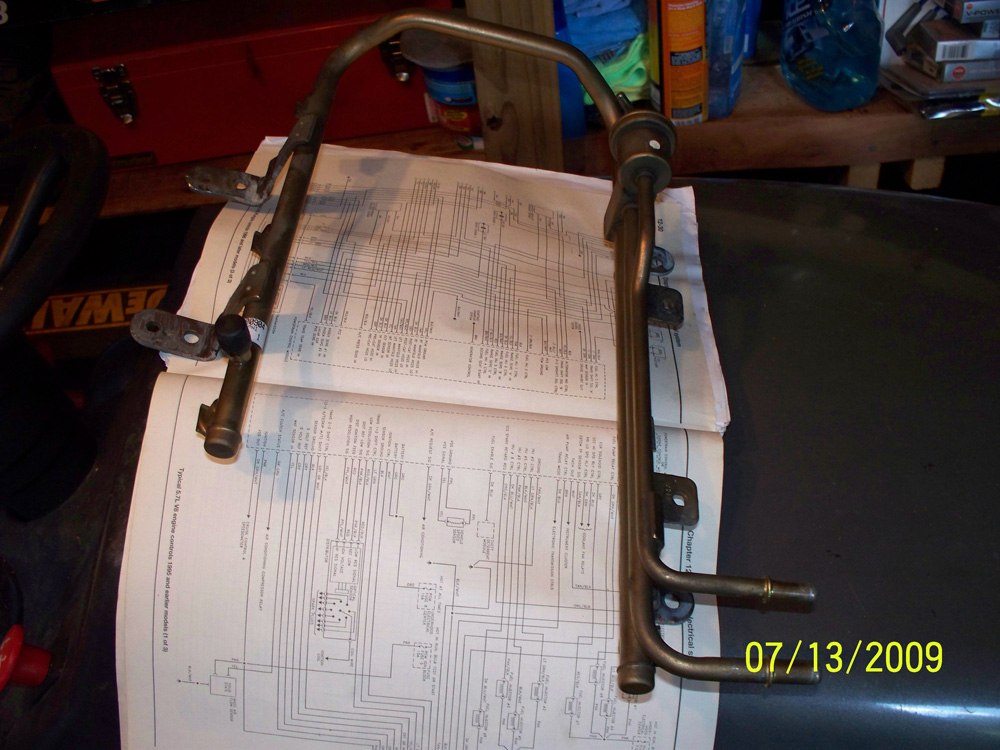
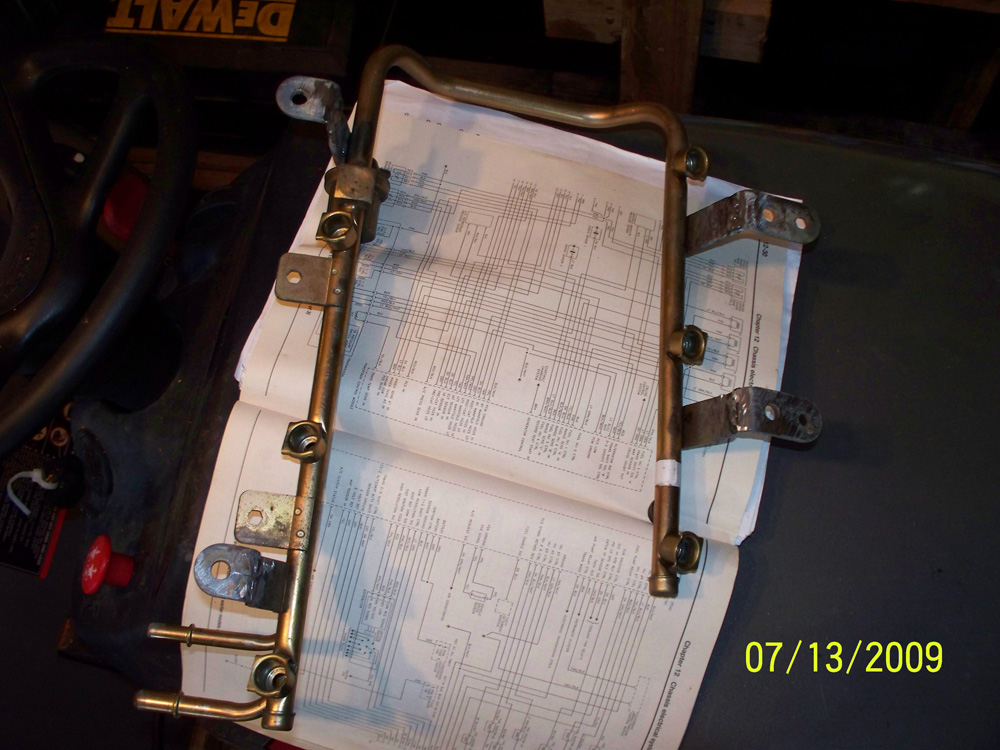
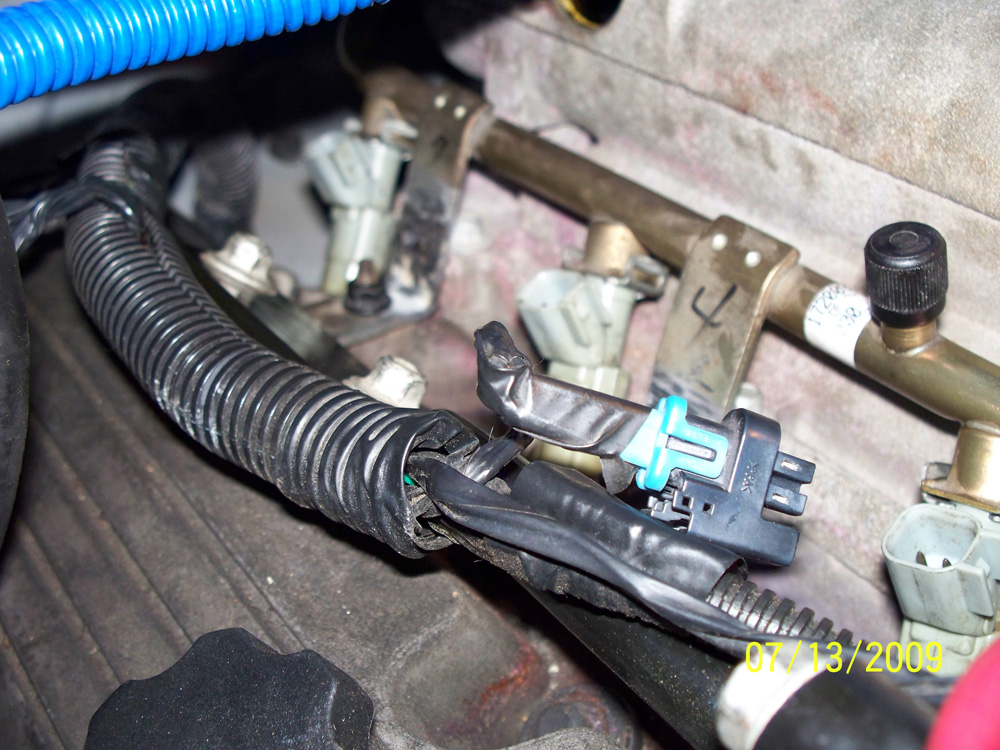
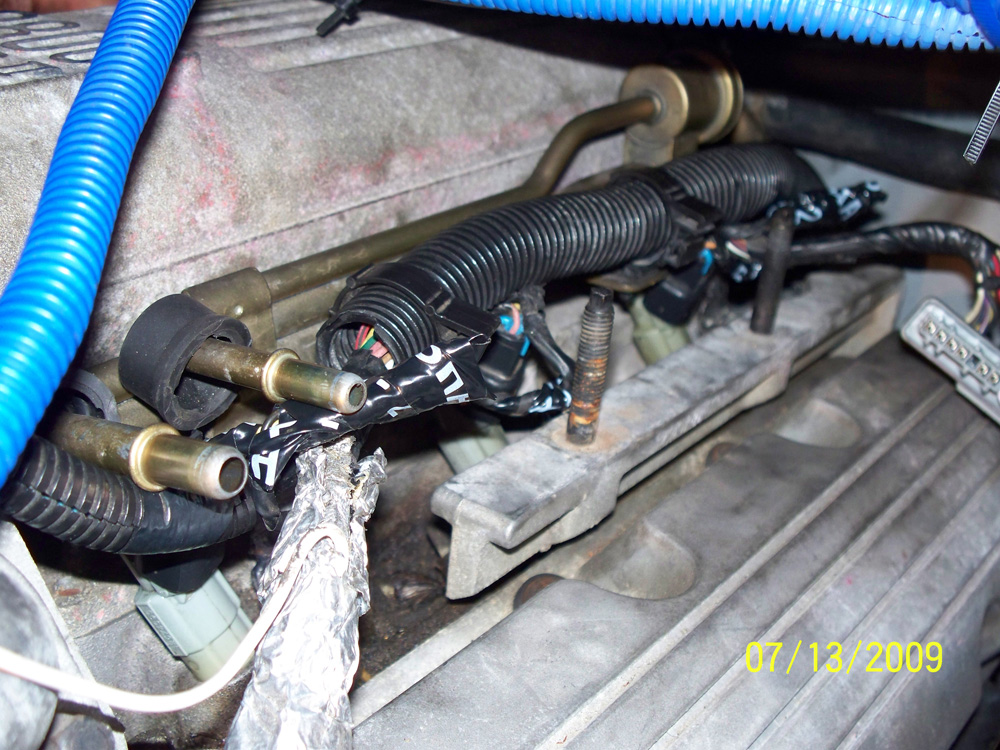
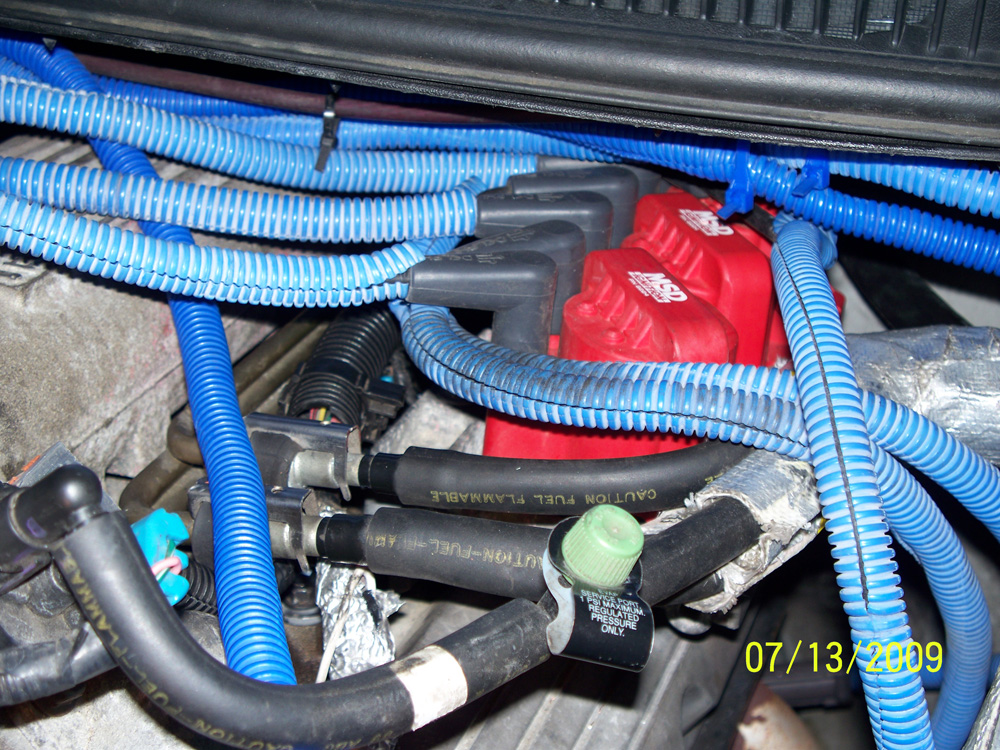
Well, day one of fuel injector install... and all went pretty smooth until I tried to put the 95-99 fuel rail with the new injectors to the motor, and found that the legs on the legs on the 95-99 fuel rail are 2", the same as my 2000... :( plus found that the o-rings for the 2000 injectors for bottom are a smaller size for the 36lb injectors, so i used the bottom old O-rings off the injectors that came with the 95-99 fuel rail.. I may get new lower O-rings, but my dad said the bottom ones off the injectors from the 95-99 fuel rail would be fine, they where still soft, and i had no problems putting them on the 36lb injectors.

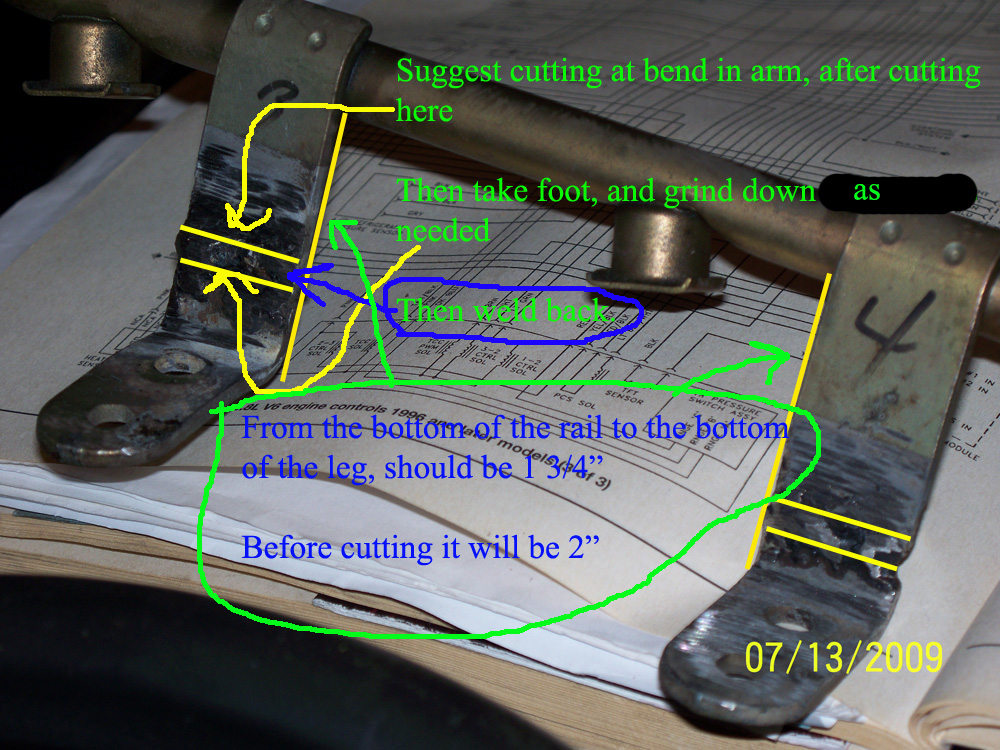
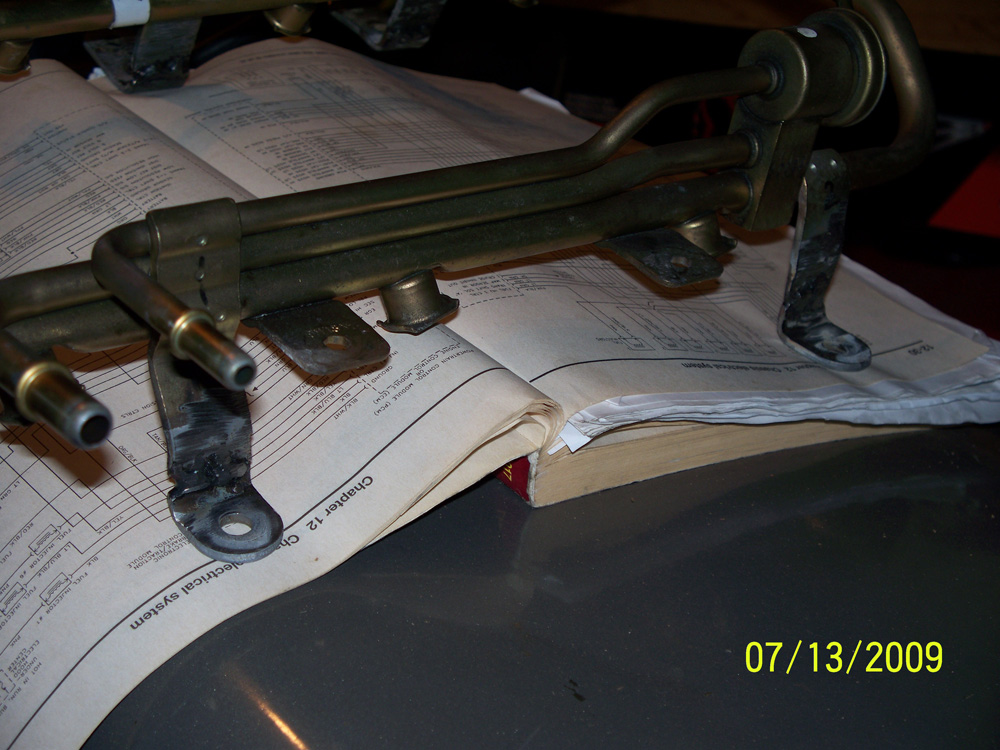
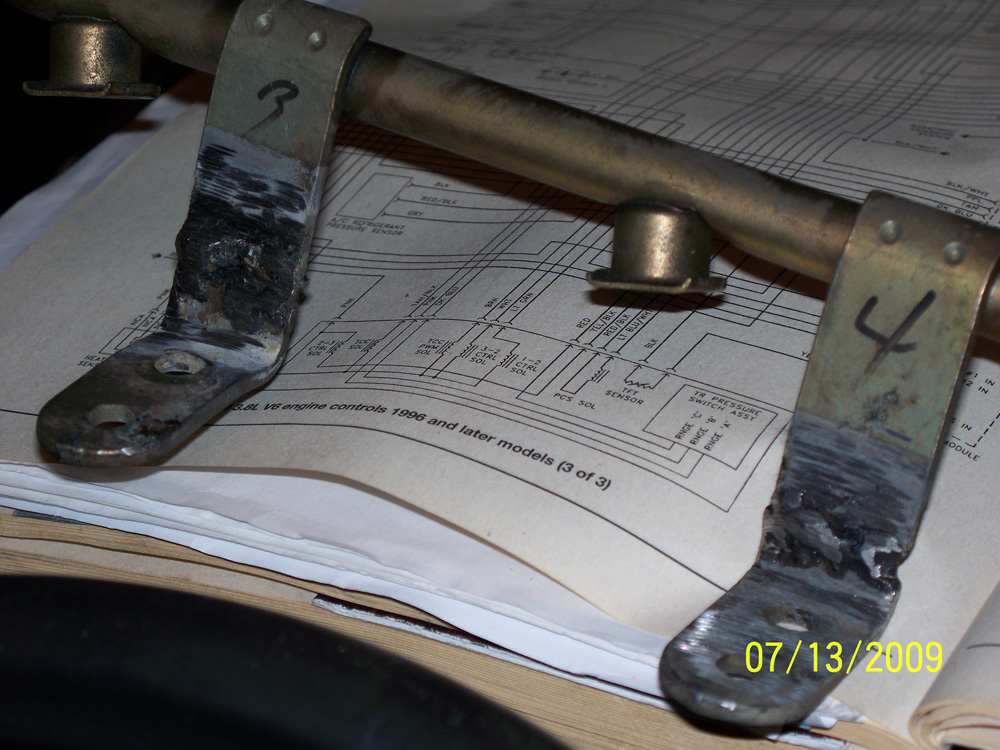
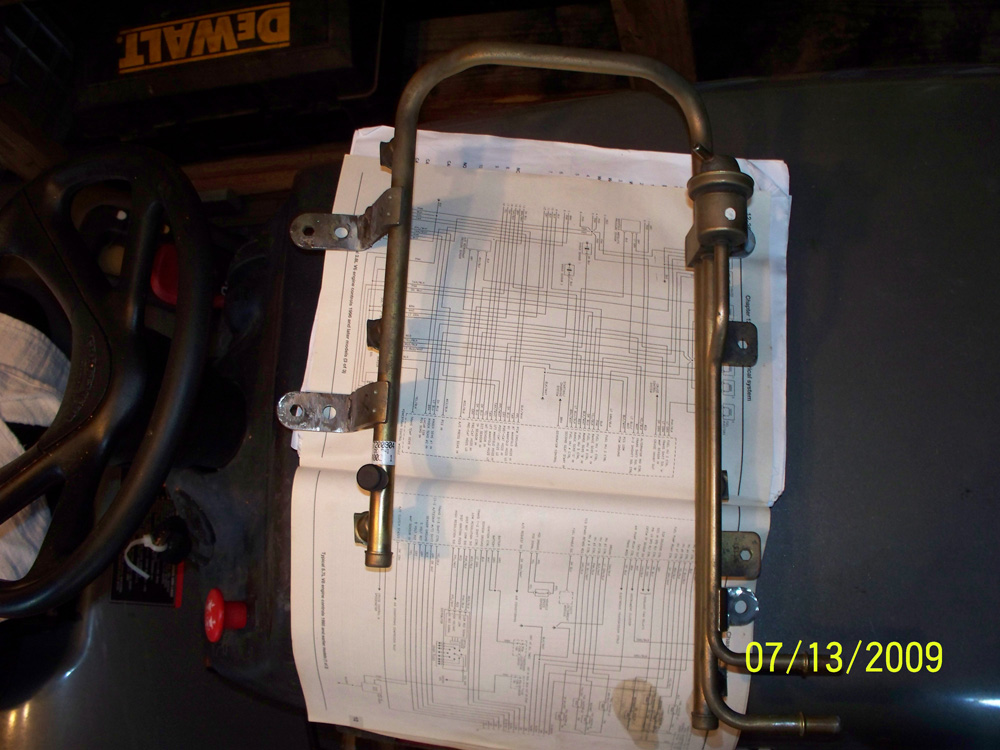
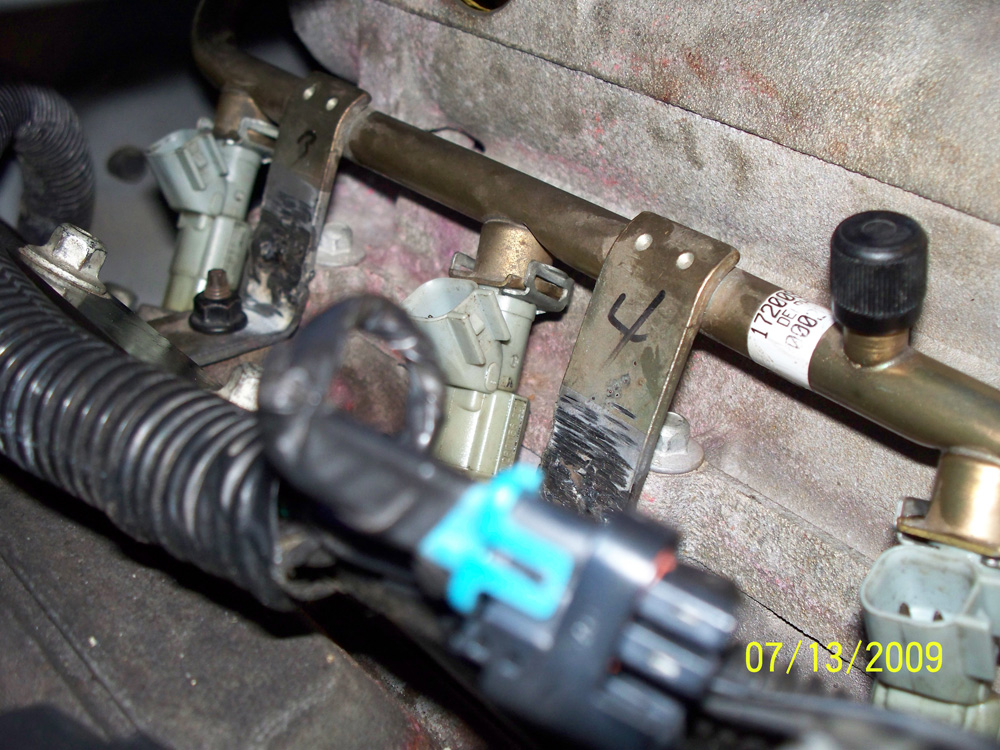
So after about hour or hour 1/2 of beating and bending the 95-99 fuel rail legs, we have come to a conclusion that cutting the leg and welding it will be the best. To seat the 36lb injectors, the leg needs to be 1' 3/4, instead of 2'. i don't understand why the legs on the 95-99 are 2' since the injectors that came with them are the same size in length as the 36lbs ones. The 2000 22lb injectors are about a 1/4 bigger in length.

The only thing we can come up with, is there is a stud that the rail legs fit on, and there is a bolt on that stud, and that would be 1/4 inch. So before we hack and weld the 95-99 rail as a practice piece, we are going to see if we can remove the bolt from the stud or remove the stud completely, and use something else maybe.... bolt and washer, or something, I'm sure my dad knows right off since he's work on cars and mining equipment for many years.

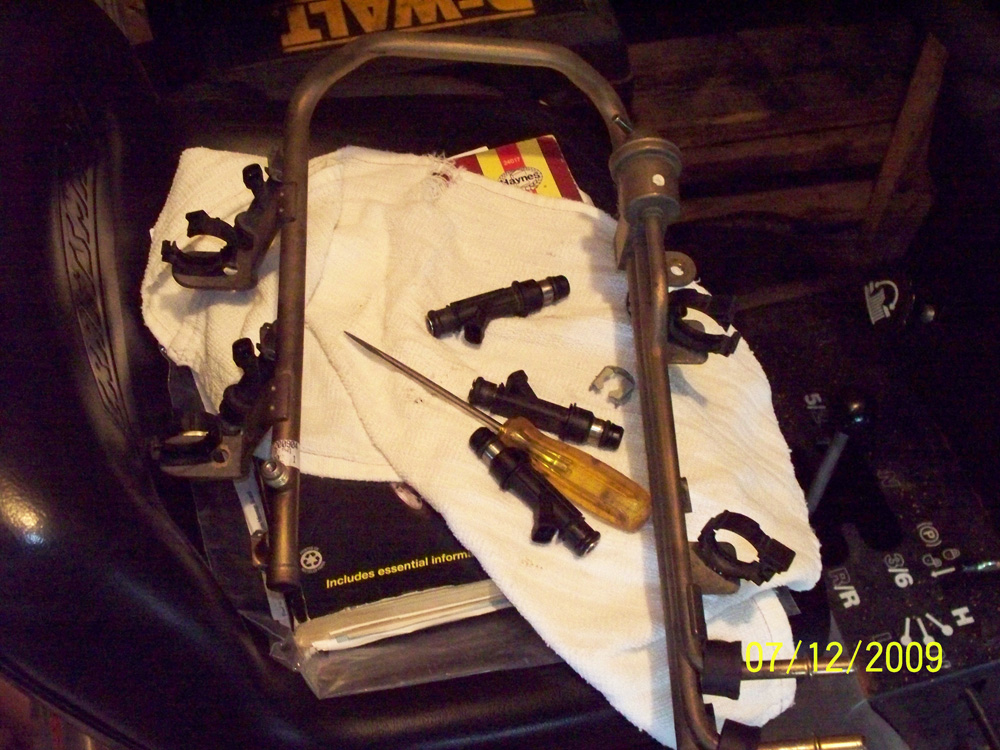
So, I'll be sure to post and try to remember to take some pics tomorrow. I took a few pics today, but theose where after i had everything taken off the engine. Was meaning to take pics as i removed everything, kinda forgot since i was looking forward and hoping to get the install done today. Tomorrow, I'll try and take pics as I'm installing everything back, key word is try :P

But, in short. 95-99 fuel rail did not work, legs where same length as 2000 rail, 2"

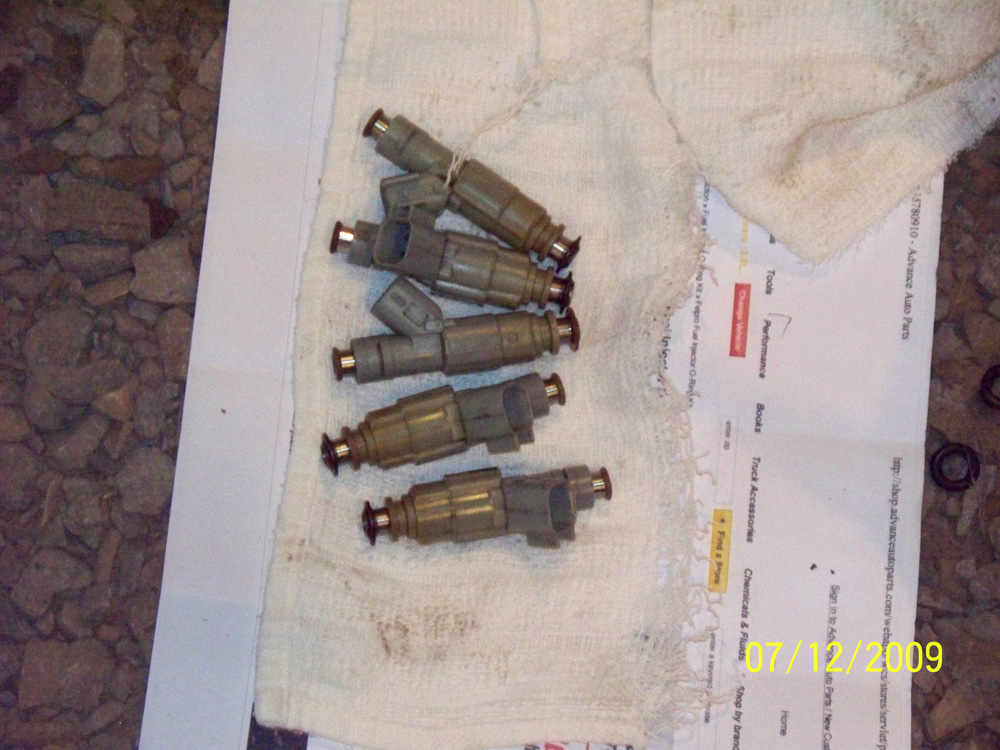
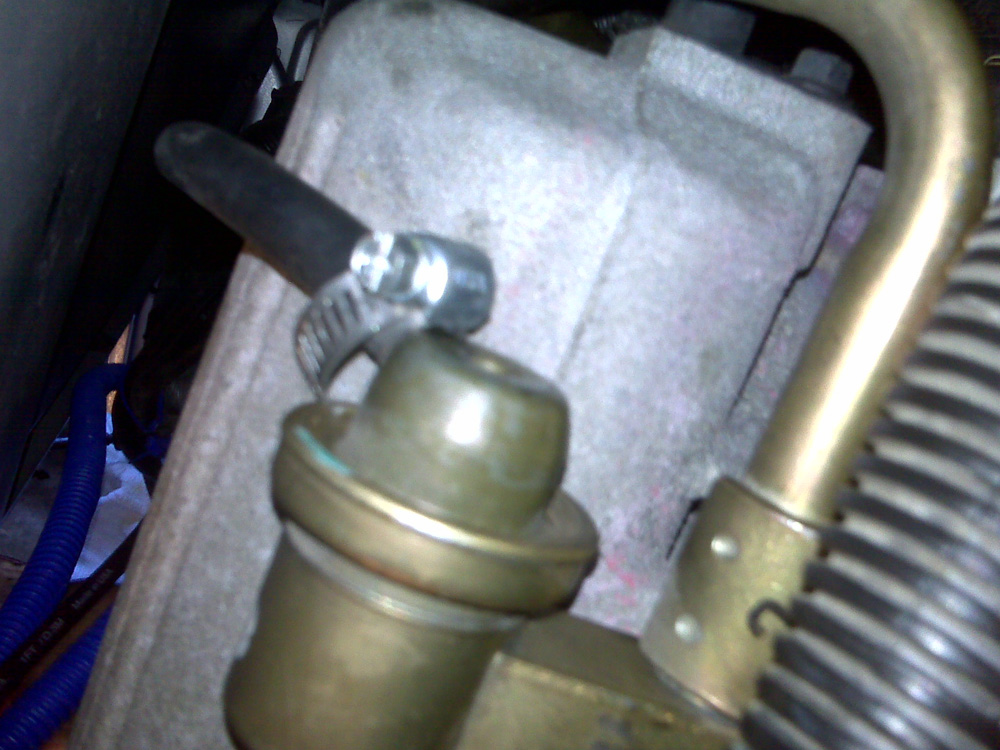
Injectors that came with 95-99 fuel rail same length as 36lb injectors, as the 2000 22lb injectors are right at 1/4 longer.

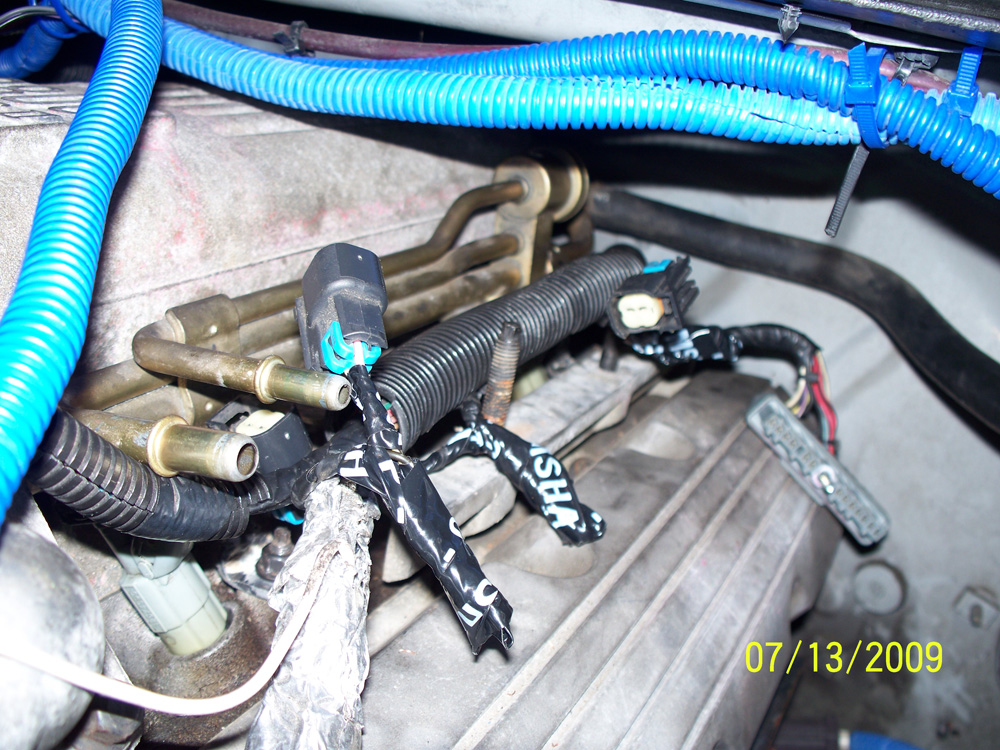
New O-rings that I bought for the install was for the 2000 injectors, found out the top worked, however the bottom one would not, the O-rings were to small and skinny, so I currently used the bottom O-rings from the injectors that came with the 95-99 fuel rail. May get new ones, but these seem soft and seemed to go on easy, onto the 36lb injectors.

Going to first try and remove the studs that the fuel rail legs set on, and that would take the 1/4 inch, that is needed for the new 36lb injectors to seat. If not, the 95-99 fuel rail will be used to cut and weld as practice so the 2000 fuel rail will be a better product :P

And I think that is everything for now, more tomorrow... hopefully everything will go smoother tomorrow...
User avatar
Guardian
Supreme Knight(Site Admin)
 
Topic author
Posts: 645
Joined: Mon May 30, 2005 7:00 pm
Location: VA, USA
Gender: Male

Re: 36lb injector install for 2000 v6 Camaro

Postby Guardian » Tue Jul 14, 2009 12:28 am

Me and dad finished the injector install today. Went a little smoother, after figuring we would need to cut and weld the fuel rail. Read below for info and pics of the install.


Installed on-->2000 v6 Camaro
parts used--->GTP 36lb injectors and current fuel rail.

Notes: Top O-rings will work from a 2000 Camaro, however the lower O-rings are to small from the 2000 injectors to use on the 36lb injectors, you will need 95-99 bottom O-rings.

If you can find a 95-99 fuel rail, then it's suppose to work perfect with the 36lb injectors, should allow them to seat with no problems. I bought a fuel rail of E-Bay, that was suppose to be from a 95-99, but I'm guessing it wasn't... They must have just put older injectors on a 2000+ fuel rail, because the 95-99 they sent would not work.

Make sure you oil the O-rings top and bottom to allow easy fit into the engine and the fuel rail.

Look below for the measurements if you wish to use the stock fuel rail. If you do use the stock fuel rail, I suggest cutting and then welding the fuel rail. Do not try and bend the arms, the metal is to strong and you'll bend the fuel rail to the point, where it will be hard to fit on the engine, even after cutting and welding the arms. We tested this out on the fuel rail that I bought off E-Bay, after bending the arms, we found, that was a waste of time, and even after measuring and welding, the bending we did before, made for a hard fit. However, it was good practice, cutting and welding on the first one, learned what to do and not to do on the 2nd :P

Here are the measurements. I will also have a pic or pics that will show the measurements. I will try and have them listed first.

Measurements are from center of arm hole to center of arm hole. For the front end measurement, you will need to use a ruler or something straight to help measure.

Fuel rail measurements
Driver side--> 8 7/8"

Pass side-->4 3/8"

Backend-->9 5/8"

Frontend-->9 1/2"


Measurements for length and width, from hole to hole
Image


The process of measuring, cutting, grinding, and welding
Image


Driver side, everything has been removed, including 22lb stock injectors
Image


Pass side, everything has been removed, including 22lb stock injectors
Image


Engine bay, everything removed for install
Image


Stock 22lb injectors and fuel rail
Image


36lb injectors
Image


Closer pic of driver side, everything removed
Image


Closer pic of pass side, everything removed
Image


Fuel rail after legs have been cut, grind, and weld
Image


Driver side
Image


Pass side
Image


Fuel rail after legs have been cut, grind, and weld
Image


Fuel rail after legs have been cut, grind, and weld
Image


Fuel rail after legs have been cut, grind, and weld
Image


Driver side, new injectors and fuel rail set in place
Image


Pass side, new injectors and fuel rail set in place
Image


Pass side, new injectors and fuel rail set in place
Image


Driver side, new plug-ins wired, ready to hook up
Image


Pass side, new plug-ins wired, ready to hook up
Image


Driver side, new plug-ins attached to 36lb injectors
Image


Driver side, coil pack and fuel lines re-attached
Image


Pass side, everything re-attached
Image


Pass side, everything re-attached
Image


Driver side, spark plug wires re-attached
Image


Not in order with other pics, this is of the driver side back of engine, reinstalled vent line to fuel rail
Image
User avatar
Guardian
Supreme Knight(Site Admin)
 
Topic author
Posts: 645
Joined: Mon May 30, 2005 7:00 pm
Location: VA, USA
Gender: Male


Return to Advance Tech

Who is online

Users browsing this forum: ClaudeBot [Bot] and 0 guests